

How to Arrange Roses
Roses are perfect for brightening any space, lifting our spirits, and filling us with a sense of calm as we gaze upon and admire their beauty, so why not make them a regular part of your life? Arranging fresh-cut rose stems into an enchanting design is easy. Below are two of the most popular flower arranging methods you can do yourself.

Prepping Your Roses
When you have your fresh roses in front of you, remove all the leaves along the stem and any brown or damaged petals.
Choosing Your Vase
When choosing a vase, opaque is typically better than clear glass. A great vase shape is an hourglass shape that is wide at the bottom, eventually narrowing, and then flares out slightly at the top. Another popular vase shape is round which tends to be shorter but makes compact, striking floral designs.

Rose Arrangement #1 – European Hand Tie Method
Vase type – Hourglass
Fill the vase with tepid water no more than ¾ full. Add flower food.
After the stems have been prepped, lay them out in front of you.
Select a stand-out bloom to be your center rose. Add a second rose on an angle next to it so the stems criss-cross.

Continue adding roses in a circle ensuring the stems cross each other to create a domed effect for the buds and a sprawling look for the stems underneath.
Once you’ve used up all the roses or reached your desired size (or capacity for the vase), hold the bouquet next to the vase and cut off the stems so that rose heads are just above the lip of the vase. The roses are now ready to be placed into the vase. Fluff up and move individual stems as necessary, but the bouquet should be fairly tight with little to no gaps. If the arrangement is too loose and falls open, remove them and bind the bouquet at the base with twine or florist tape before placing back into the vase.

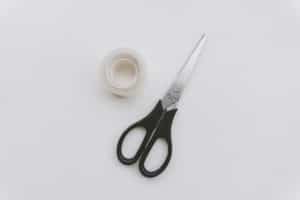
Rose Arrangement #2 – Tape Grid Method
Vase type – Round
Fill the vase with tepid water ¾ full. Make sure the edges of the vase are dry. Next, cut strips of clear tape and place them across the top of the vase in a horizontal and vertical grid fashion. The grid will help keep your flowers upright as you build your arrangement, leading to a robust design with evenly spaced flowers.
After the stems have been prepped, lay them out in front of you.
Cut the Stems
In order to create a full, rounded dome look, cut the roses at varying heights (at ½ inch increments) so the shortest rest just above the top of the vase and the tallest is about 2 inches from the top of the vase.

Arrange Your Stems
Start with the tallest bloom and place it in the very center. Surround this bloom with the second tallest stems in a circular fashion. Continue doing this with the shortest blooms making up the outside circle of the arrangement. The grid design is perfect for also adding greenery to add height and dimension.

For all your wholesale floral needs, visit Cascade Floral to find the best, highest-quality, and longest-lasting blooms.